Help:Profiles

General Profile Guides
Explaining User Profile?
Objective
This article will explain the User Profile in JomSocial, what it is, and how it works, as well as explaining some common misunderstandings when it comes to the relationship between the Joomla and JomSocial User. Kindly read the documentation carefully and contact us via support channel if there is any issue.
What is the User Profile?
Joomla is a very powerful CMS system, but when it comes to extending the user object, it is not very good solution to use. In latest versions of Joomla, some effort is put into enhancing the user object with custom fields you can set using the built-in User - Profile plugin that is shipped with Joomla 2.5 and above; however, that is definitely inadequate for the needs of a user profile in a social network.
This is where the native Joomla profile manager will stop and the new profile manager, JomSocial's, will begin. For this transfer of control to occur, the Joomla User - Profile plugin must be disabled.
What Can I Do with User Profiles?
Flip City User Profiles can do many things that cannot be done with the native Joomla user profile. User profiles are at the core of a social network environment, so within your profile, you will be able to:
- See other profiles.
- Add friends to your network.
- Send private messages-chat to other people in your network.
- Upload video and photo galleries for others to view or to view others’ video and photo galleries.
- Control the privacy of your profile or block others.
- Have different sets of Custom Profile Fields for your profile.
- Delete the profile data if needed.
Common Misconception
A very common misconception is that once JomSocial is installed, it somehow creates its own user. More often than not, you will hear people asking questions similar to, "Will my Joomla Users work with JomSocial's Users?"
On a Joomla site, there is no such thing as "component user." Not only with JomSocial, but with 99% of the known extensions in JED. At this time, we are only aware of one single component with its own user; however, if you already using JomSocial, there will probably be absolutely no need to use it.
How This Works in Practice
It actually works very well because it allows multiple components to share a single user across the entire site.
How JomSocial Implements This
When a user is created, it is stored in the Joomla Users' database. All mandatory fields such as Name, Username, Email, and Password, are stored in Joomla #__users table JomSocial then uses that information and adds Custom Profile Fields, Friends System, Private Messaging, Photo and Video Galleries, etc.; however, JomSocial will never:
- Control the session of the user.
- Handle the logins/logouts or activations.
- Manage passwords resets.
- It will NOT handle any registration emails. It will, however, provide HTML template for those.
All that is strictly handled by Joomla itself.
"Help! I see a strange profile after a user is activated!"
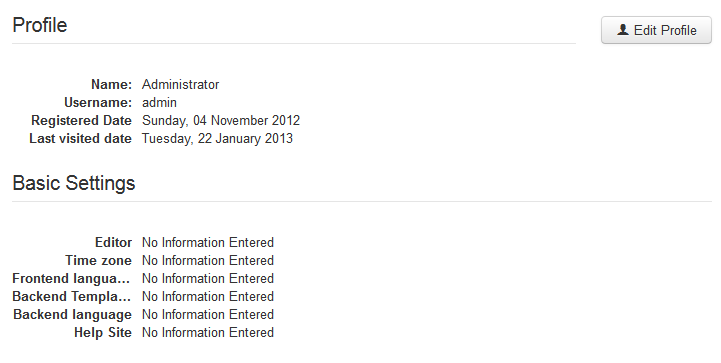
If after login, you see a page similar to the screenshot below, don't worry, it is just a Joomla Profile page that users are never supposed to see, but they did because the native Joomla login form was used for their login.
This often happens after users verify their account. Some popular Joomla template Clubs, override this view and include the Joomla Login fields on that screen. If this is the case with your site, please navigate to:
- ROOT/templates/YOURTEMPLATE/html
- If in this directory you find another folder named com_users, rename it to something else.
IMPORTANT: If after this, you still see the Login Form from Joomla, please contact your template provider(s) for more information about how to remove it since it really shouldn't be there. The default Joomla behaviour is to give users a button to get back on the Home page of the site, NOT the Login Form. This is not the JomSocial page and therefore we cannot do anything about it.
Creating Profile
Creating a Profile from the Frontend
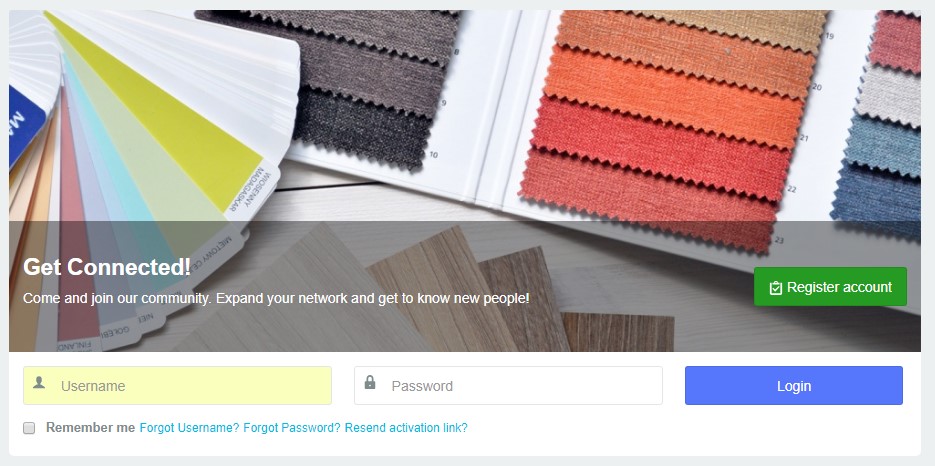
Navigate to the JomSocial Frontpage and click the green Join Us Now, Its Free! OR Register Account button (depends on Theme and Extension version).
Inputting the Joomla User Information
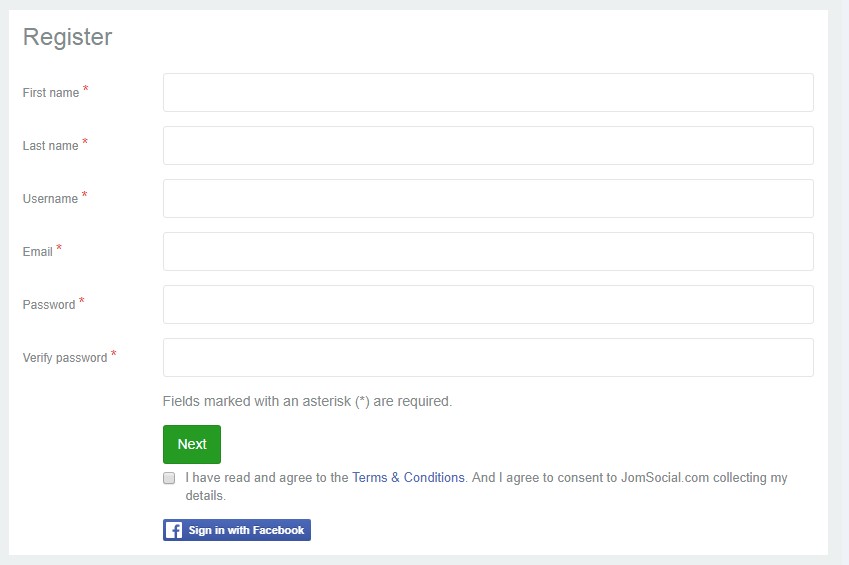
The very first screen of the JomSocial registration flow is actually handled by Joomla. This might sound strange because the registration occurs through the JomSocial form; please read this article to understand this process. You will need to fill in all the fields on this screen in order to proceed further.
All of the information needs to be provided. If some of the information is not provided, JomSocial will notify users that errors must be corrected before proceeding.
Click Next to proceed
Note: Be aware that Joomla User Object is still not created. It is only created after the registration flow has been completed.
ReCaptcha
If you configured ReCaptcha in the JomSocial configuration, it will show up on this screen. Many people will give good arguments for using ReCaptcha to prevent spambots to register on the site; however, if the JomSocial registration flow is the only way for users to register on the site and you use Custom Profile Fields as outlined in the following section of this tutorial, you will most likely do just fine without ReCaptcha as there is no way for spambots to guess all of the custom profile fields you set, especially if you use a combination of dropdowns, checkboxes, multiple selects, etc..
Populating the Custom Profile Fields
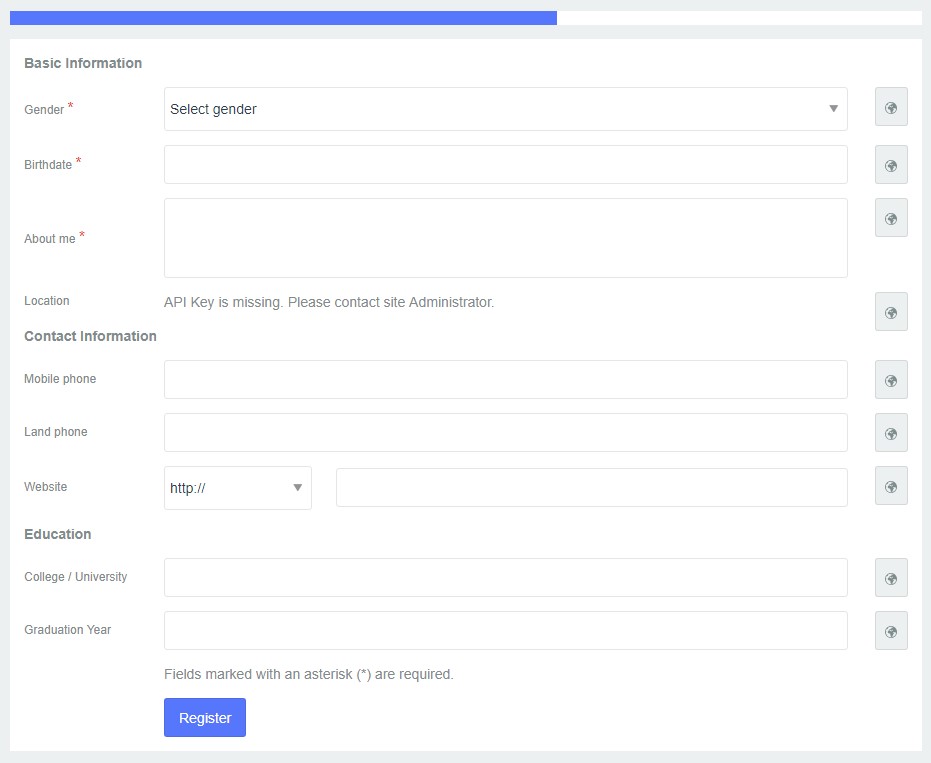
This is the step of the registration where the actual JomSocial User Profile is created. The fields on this screen may vary, depending on the Custom Profile Fields you have set for the site.
Provide required information and click Register.
Uploading an Avatar
This is the last step of the JomSocial registration flow. Avatar upload is not mandatory and you can either skip it or click Next.
Completing the Registration
Depending on the type of New User Account Activation that was set, as covered at the very beginning of this tutorial, the last screen will vary; however, in our case, it will show this screen:
Click Back to home or login to site. At this point, your Profile will have been created!
Deleting Profile
Deleting a Profile
This action must be initiated and confirmed by the user only, by clicking on the option displayed in above the picture, and then confirm the deletion by clicking Yes, delete my profile.
After clicking Yes, delete my profile, the user will automatically Logged out (not deleted) from site with the ability to log back in again. The email will be sent to the site Admin, notifying the Admin about the user's request to delete his/her profile.
NOTE: From JomSocial 4.5.4 this option is changed, Now User can delete his community profile data like a stream, message, photos, video etc and his account will not be unpublished.
Automatic Profile Deletion
This is not possible in the Joomla environment. As mentioned at the beginning of this tutorial, Joomla does not have any Frontend facilities to accommodate such an action. Since JomSocial relies on the Joomla User Object, it is impossible for us to delete the user account from the Frontend of the site.
One of the other issues that also prevents us from implementing this feature include: hooks that are triggered when user is deleted. These hooks are only triggered in the Backend and are used in the JomSocial User Plugin to delete all the associated data from the deleted user.
Profile Preferences
Overview
Profile Preferences are accessed through the Toolbar navigation from the Profile tab.
These options allow the user to set various preferences for each individual profile, overriding all options that are set as default in site Backend.
General Preferences
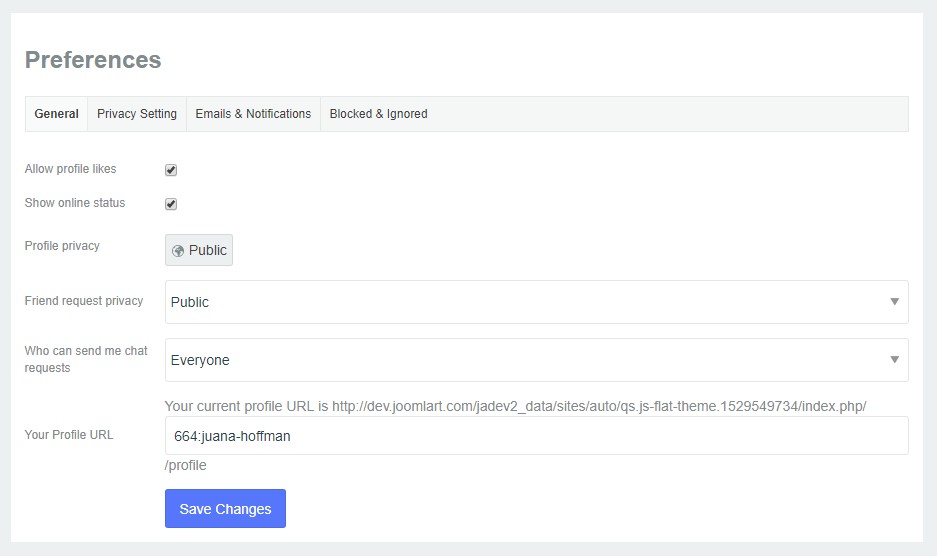
General preferences may be set by going to the home page and select the Preferences link in toolbar navigation. This page will allow you to set:
- Profile Likes - Select whether profile visitors will be able to Like profile
- Show online Status - Who can see you online.
- Profile privacy - Who can see the profile
- Friend Request Privacy - Who can send you friend request.
- Your profile URL - Only if native Joomla SEF is enabled will users be able to choose their unique profile URL.
- Who can send me chat request - Sets who will be able to send you chat messages.
Privacy Settings
Privacy Settings will allow the user to control various privacy settings in the user's profile. These options are:
- Friends - Control who will be able to see the friends of user.
- Photos - Determine who will be able to see user’s albums and all of the photos in it. Remember, this is actually the entire album privacy option; photos inherit the privacy of the album. You can also apply the same setting to all albums.
- Videos - Govern who will be able to see videos of user.
- My groups list - Sets who will be able to see the groups list of user. This option will only control the groups list on profile.
Emails and Notifications
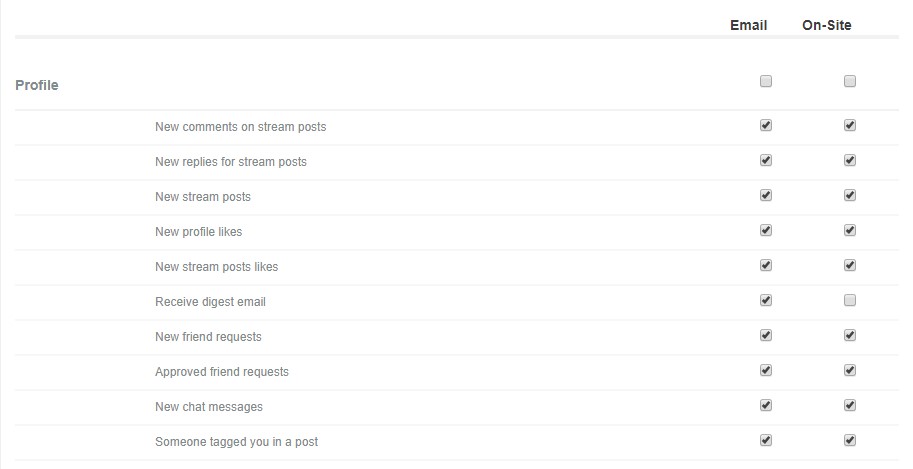
Settings here allow the user to specify the user's own preferences regarding the kind of notifications that would be generated for the individual profile and overriding the defaults set in the site's Backend. There are two types of notifications which users can control. Email notifications are those sent by email, while the On-Site notification generates alerts in the Toolbar's general notification action.
Blocklist User
It's a simple list of all users who are blocked by the profile owner.
Karma System
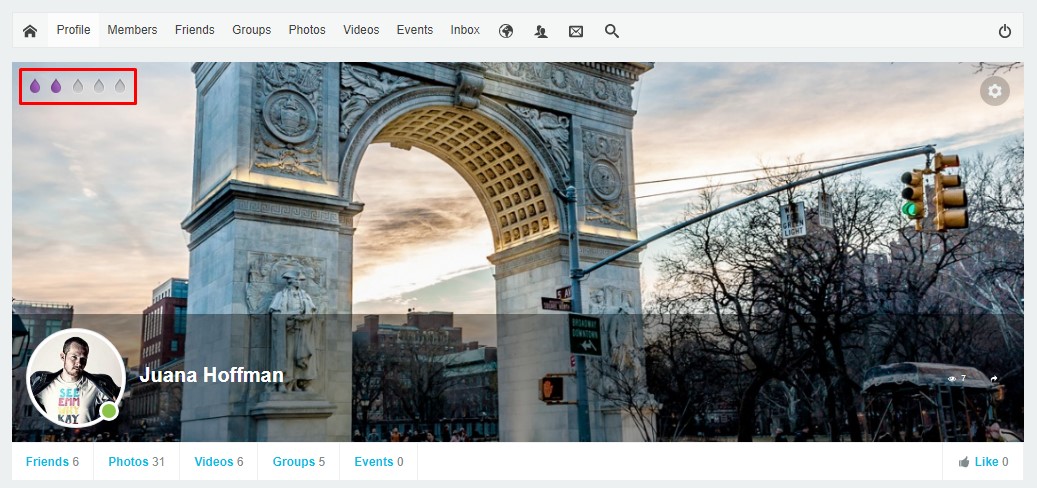
In New Jomsocial version Karma is used as user badge used in JomSocial. It shows how active a user is in JomSocial. Karma will only be activated when a user has uploaded a photo in the user's profile or do other activity Based on the user point the user will get karma on his profile page. Otherwise, the user will never achieve any badges. In Jomsocial 4.5 The name is used as Badges, you can add new badge as well via admin panel.
This is how it looks like on Frontend when the user has accumulated Karma Points
Friends
Friends System
This system allows users to add other users to their Friends List. This is action must be approved by BOTH the requester and the recipient of the request. The Friends system also allows the user to invite, by email, the user's friends who are not already in the network, or to search for friends in the network by any custom profile field that is set as searchable.
Search Friends
Overview
Searching for friends or new people has never been easier. JomSocial allows you two (2) types of search: a simple, fast search if you know exactly who you want to find or an advanced search where the user can use multiple search criteria based on Custom Profile Fields. Both search options are enabled by default and cannot be disabled in any configuration option.
Simple, Fast Search
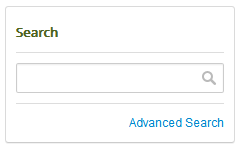
If you know the exact name or username of the person you are looking for, you can simply write it in the quick search box on the community's Frontpage.
You can also access the quick search option from any Friends-related page, where you will have an additional option to search only users who have uploaded avatars.
Advanced Search
Unlike the Simple Search, the Advanced Search allows the user to create criteria for searching based on the custom profile fields values. Every field that is set as searchable in the custom profile fields configuration will be available in Advanced Search.
Note: Please review the options available in the Backend configuration.
Searching for People
There are several ways to access the Advanced Search page, but the most common are shown on the picture below: When those links are clicked, the user will be redirected to the Advanced Search page where unlimited, custom criteria for a search can be built.
Add Friends
Overview
One of the most basic purposes of a social network is adding friends. JomSocial allows everyone to easily add friends from multiple locations on the site; however, every add action should be mutual and approved by the added person before the two become friends on site.
Adding from the Profile Page
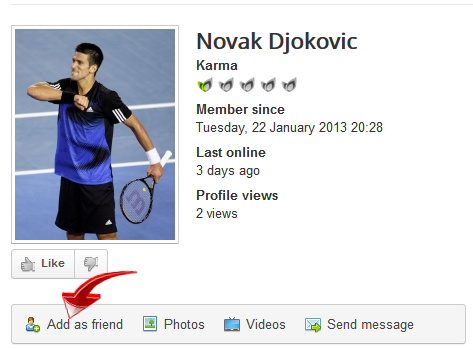
The most common way to add a friend is to visit his/her profile page and find the Add as friend button.
If the user set the Profile Privacy to be Friends you will see the page like this:
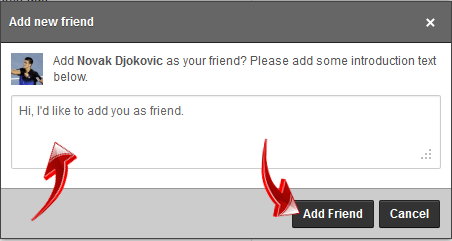
Either way, after clicking Add as friend, a new popup will show up. In this popup, there will be a text field in which you can write a custom message. This message is by default set to, "Hi, I'd like to add you as friend." and will be sent as a custom message if the user doesn't change it. There are also options to confirm adding the friend or canceling entire process.
Clicking Add Friend will finalize the process of adding the user as a friend; however, since this feature requires the approval of the person being added, the users won't become friends until the request is approved by the recipient of the friend request.
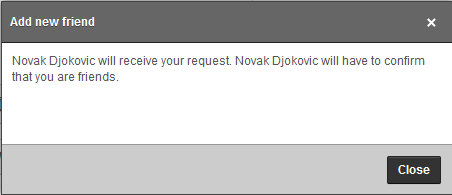
Click Close and if the cron jobs are properly set, the email notification will be sent to the added user as well as create an onsite friend request notification.
Adding from Other Pages
JomSocial does not restrict users to adding friends only from Profile Page. This feature works site-wide; basically, wherever there is a user list, there will be an option to add friends, too. Therefore, you can see this option on all User, Event, and Group Member lists etc..
Approving the Friend Request
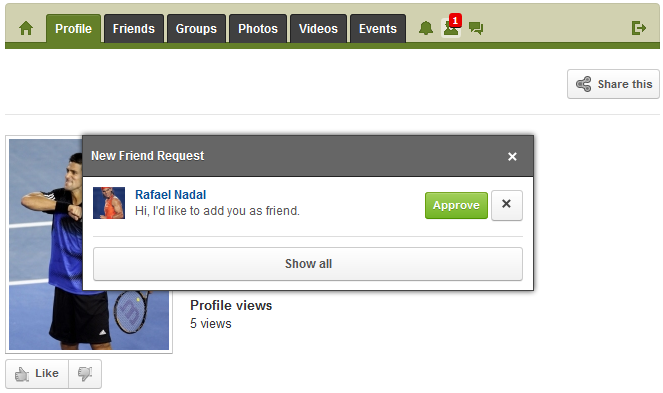
The easiest way to approve (or decline) a friend request is to click the New friend requests notification icon from toolbar.
A popup with the last five (5) Pending Friend Requests will show up. The user can approve or decline the friend request directly from this window or, if there are plenty of new friend requests, the user can click Show All which will redirect the user to a Pending my Approval page that is also accessible through toolbar navigation from Friends menu.
Clicking Approve will finalize the friendship request and the two will become friends on the network.
Private Messages / Chat
Private Messaging
Sending Message
Custom Profiles
Custome Profile Fields
Textbox Field
Textarea Field
Select Field
Profile Privacy
Privacy Settings
Miscellaneous Profile Guides
Removing Frontend User Options
Users Export and Import from CSV
Community!
This Wiki is currently Under Construction

